- Home
- /
- Article

Thanks for your feedback.


 In this article
 Feedback?
Create different schedules and apply them to calling features and user call settings to efficiently route calls based on business hours, holidays, or user availability.
Schedules define when certain call settings should be used. You can use a schedule for regular business hours, after-hours coverage, holidays, closures, or special exceptions. A schedule doesn’t control calls by itself. Instead, you assign it to a calling feature or user setting, such as an auto attendant, call queue, or selective call forwarding. The setting then applies only during the days and times defined in the schedule.
The schedule uses the time zone of the feature or setting that uses it. For example, when you assign a schedule to a calling feature, it uses the time zone of that feature’s location.
Manage organization or location schedules
You can manage organization-level and location-level schedules from the centralized Schedules page in Control Hub, and manage user-level schedules from the user’s calling settings.
You can create two types of schedules at organization or location level:
-
Business hours—Defines the regular days and times when your organization, location, or user is available.
-
Holiday hours—Defines holidays, closures, or exceptions when normal business hours don’t apply.
You can create schedules at different levels depending on how broadly you need to use them:
-
Organization-level—Use organization schedules when the same schedule needs to apply to multiple locations, such as company-wide holidays or shared business hours. You can reuse organization schedules across supported locations, calling features, users, or workspaces.
-
Location-level—Use location schedules to apply to a specific location and to calling features associated with that location.
If you access a location schedule from the Locations page, Control Hub opens the centralized Schedules page with the list filtered to that location. You can manage the schedule from the centralized page.
Location administrators can view organization schedules and assign them to supported features in their locations, but they can't create, edit, delete, or move organization schedules.
If you've a custom role with the Configure Calling features permission, you can view and manage all organization-level and location-level schedules from the Locations page. Control Hub doesn’t redirect you to the centralized Schedules page.
Create an organization or location business hours schedule
You can create a business hours schedule to define the days and times your business is open and available for services, routing, and customer interactions.
| 1 |
Sign in to Control Hub. |
| 2 |
Go to . |
| 3 |
Click Add new. |
| 4 |
On the Select schedule type page, choose Business hours. |
| 5 |
On the Basics page, enter a schedule name, and select the level, Organization or Location. If you select Location, choose the location. The schedule applies only to the selected location. |
| 6 |
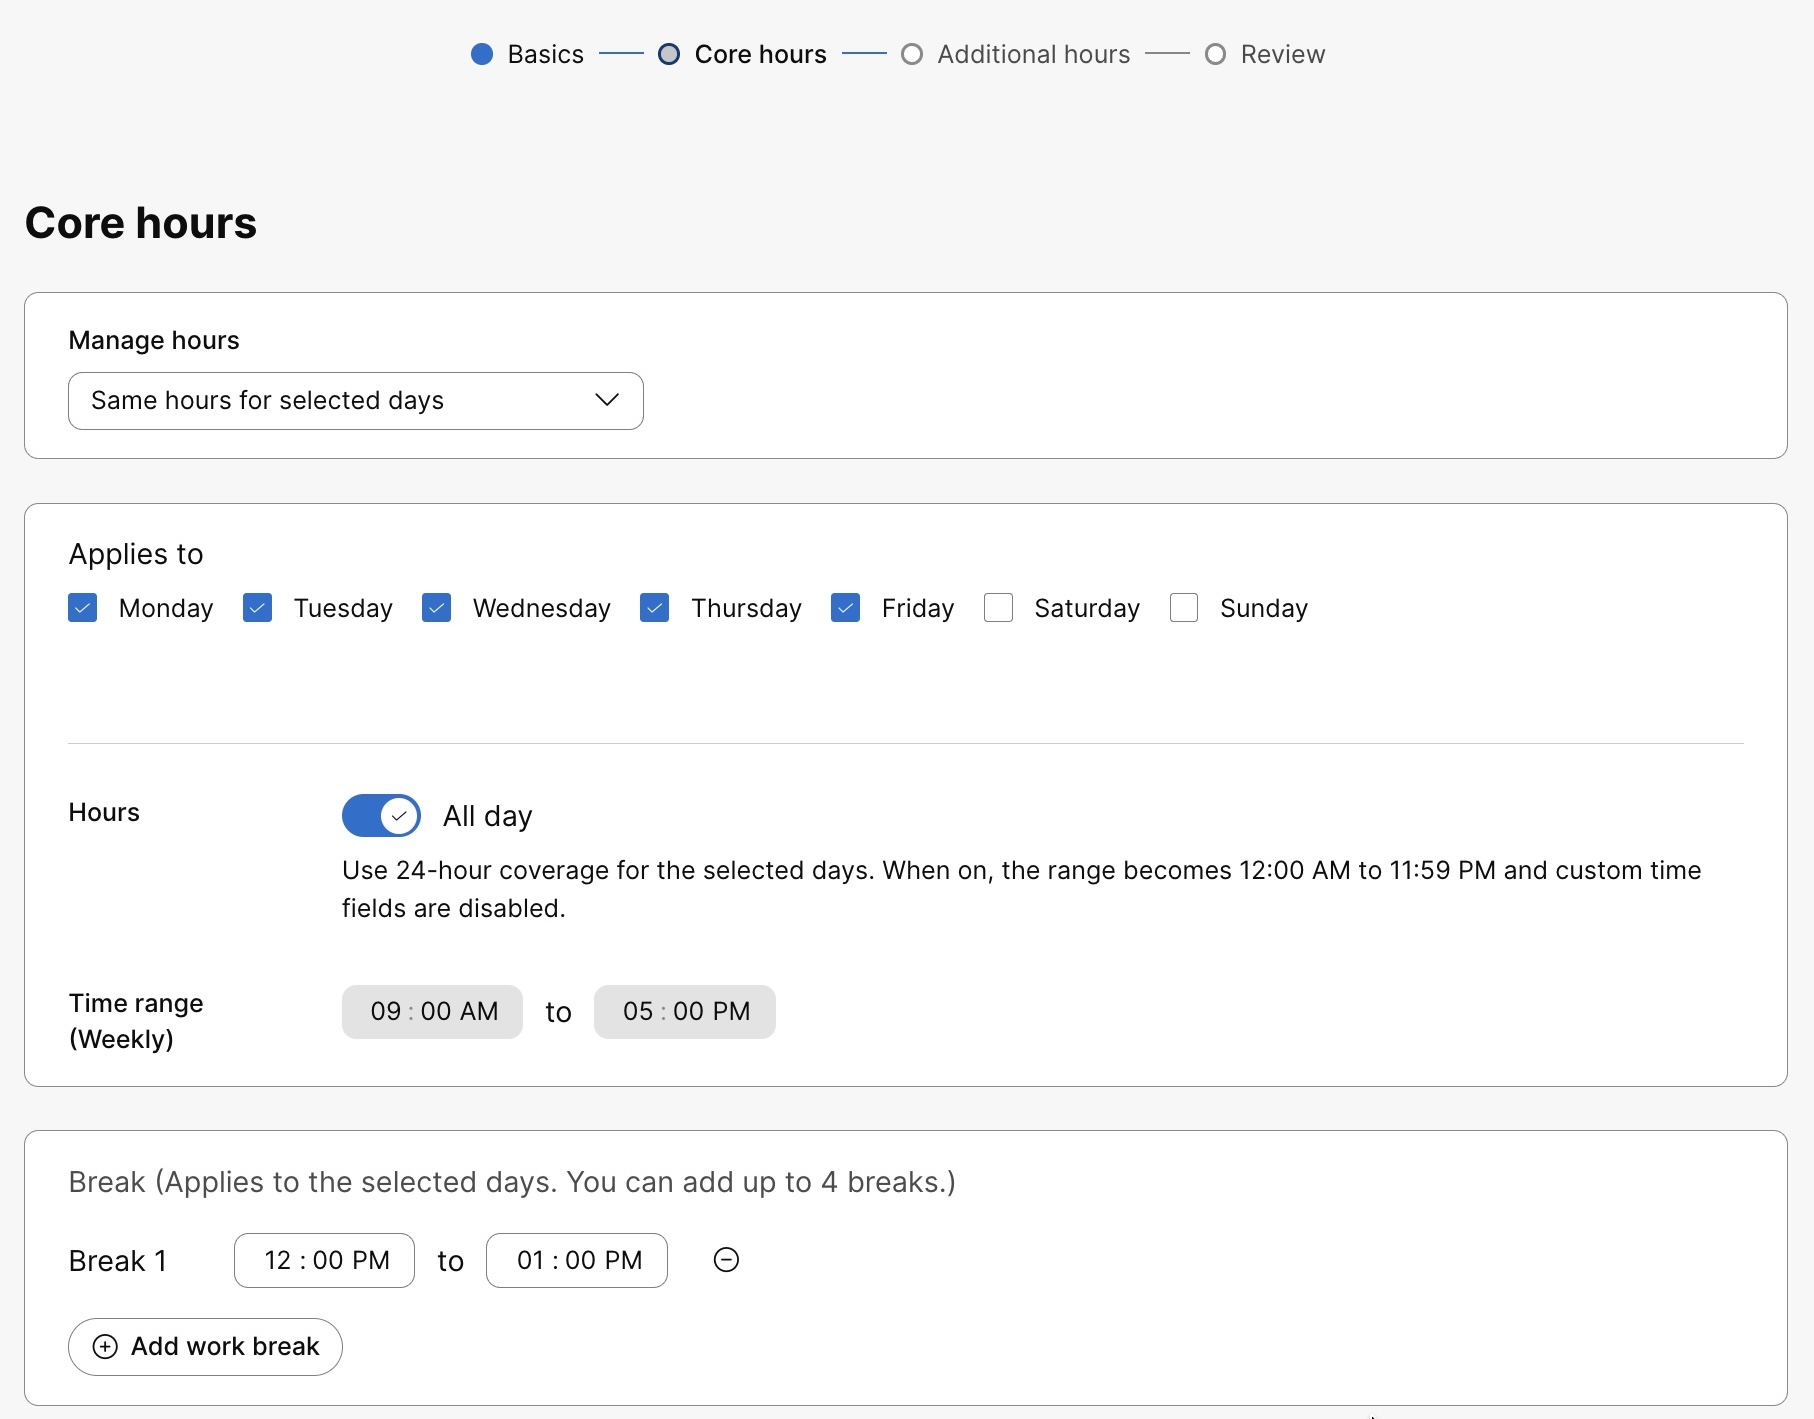
On the Core hours page, choose how you want to manage the business hours. Same hours for selected days—Use one-time range for all selected days. If you choose this option, complete the following settings:
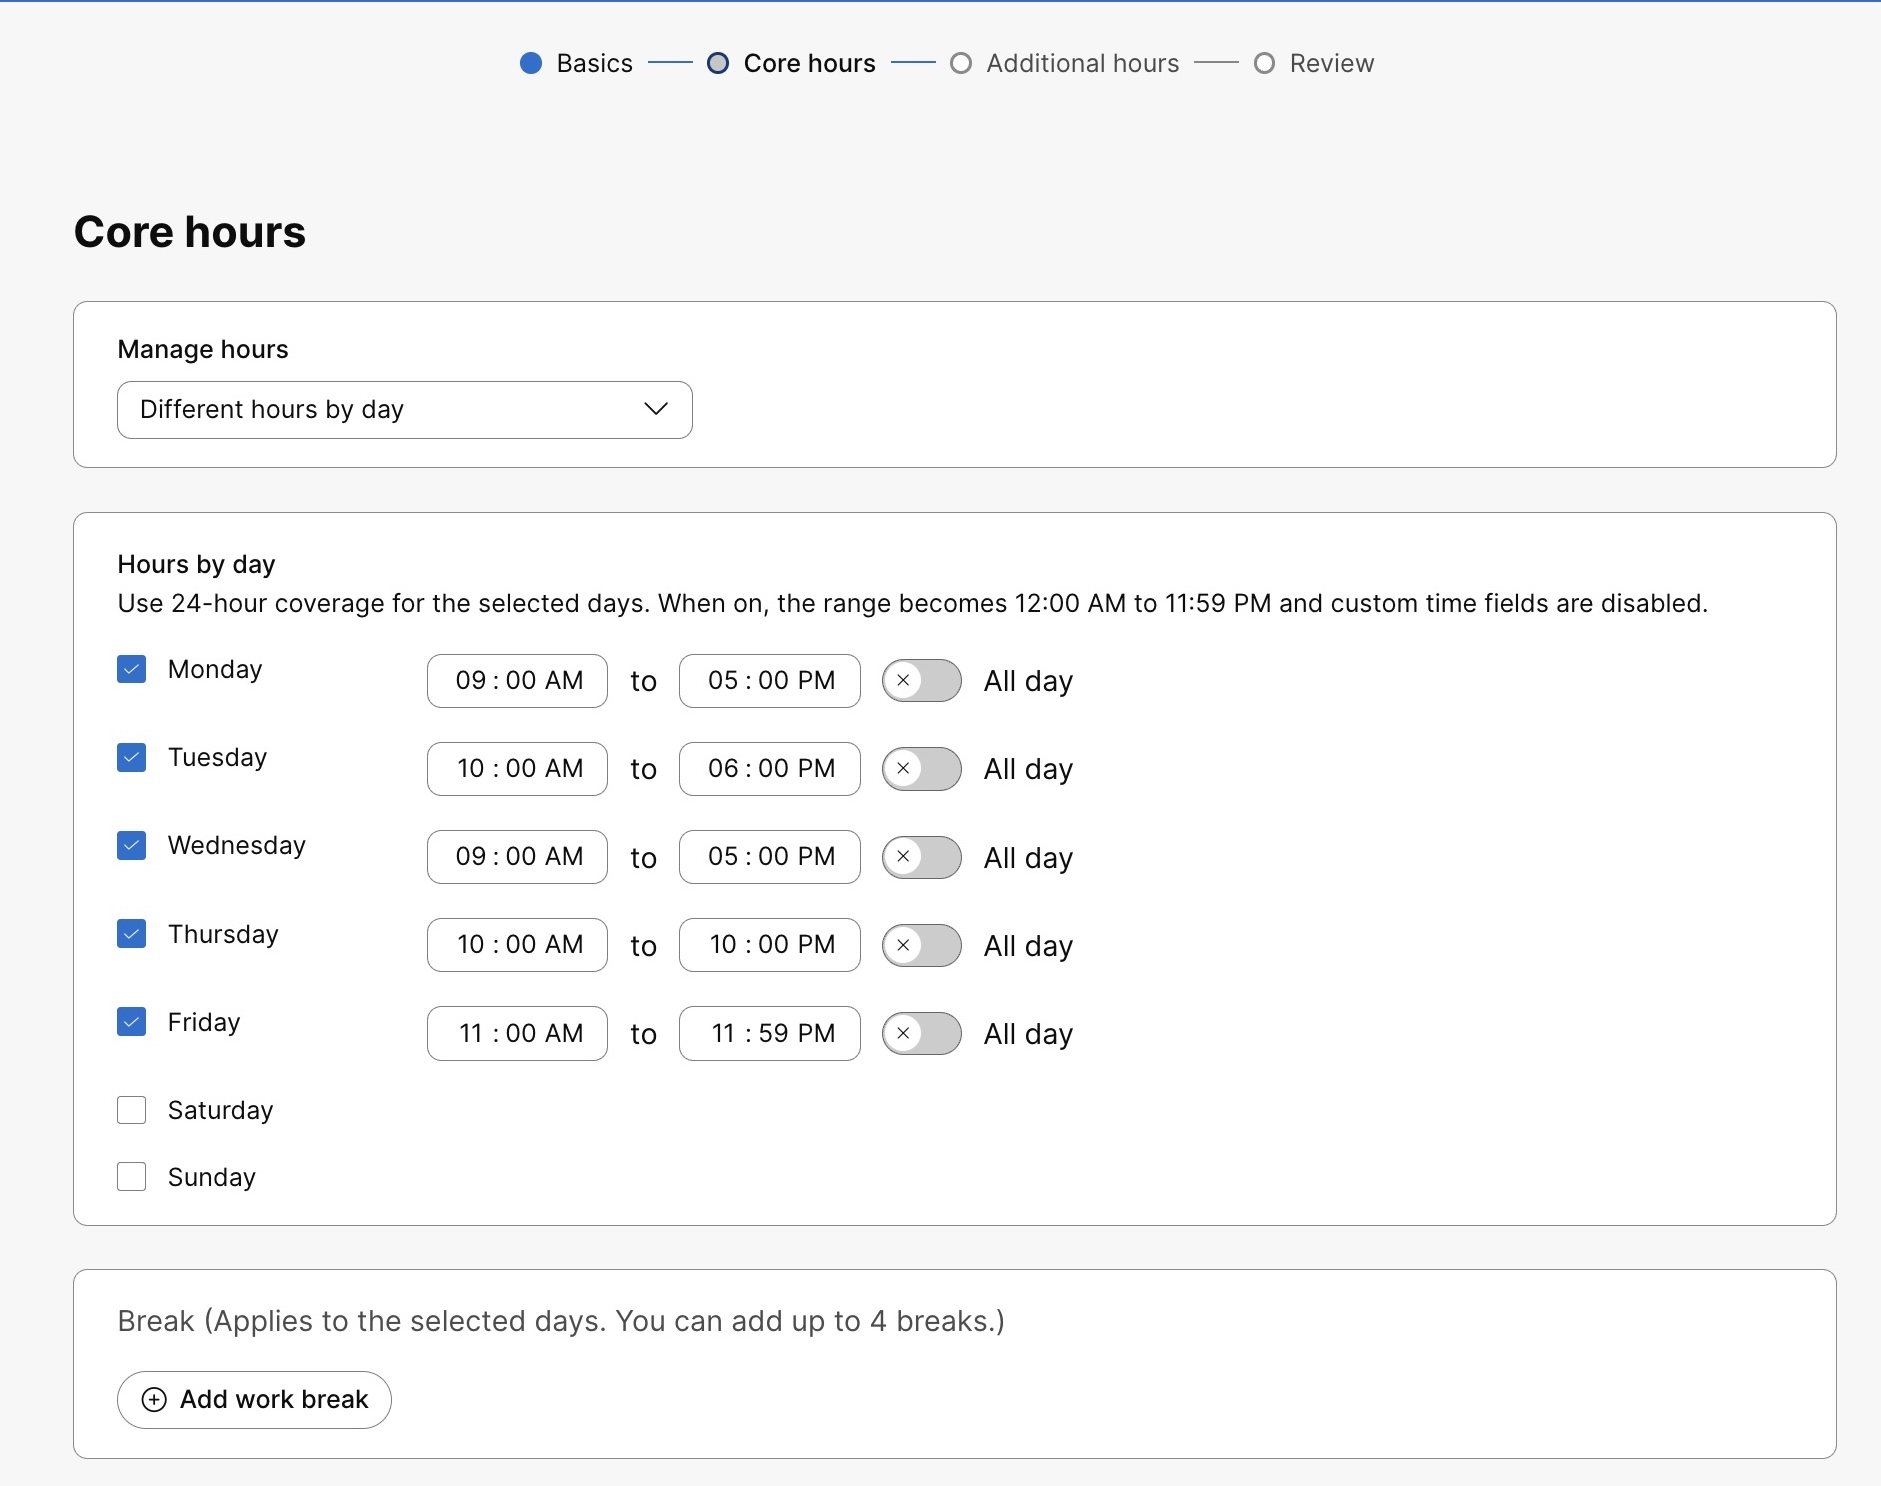
Different hours by day—Set a separate time range for each day. If you choose this option, complete the following settings:
|
| 7 |
On the Additional hours page, add any extra business-hours events. Use additional hours for exceptions or extended coverage that should be available in addition to the core business hours. You can also continue without adding additional hours. |
| 8 |
On the Review page, verify the schedule details. Review the basic details and business-hour events. Click Edit in a section if you need to change the details. |
| 9 |
Click Create a schedule. |
Control Hub returns to the schedules list. When the schedule is created successfully, a success message appears and the list shows the schedule.
Create an organization or location holiday schedule
You can create a holiday hours schedule to define holidays, closures, or exceptions when normal business hours don’t apply.
| 1 |
Sign in to Control Hub. |
| 2 |
Go to . |
| 3 |
Click Add new. |
| 4 |
On the Select schedule type page, choose Holiday hours. |
| 5 |
On the Basics page, enter a schedule name, and select the level Organization or Location. If you select Location, choose the location. The schedule applies only to the selected location. |
| 6 |
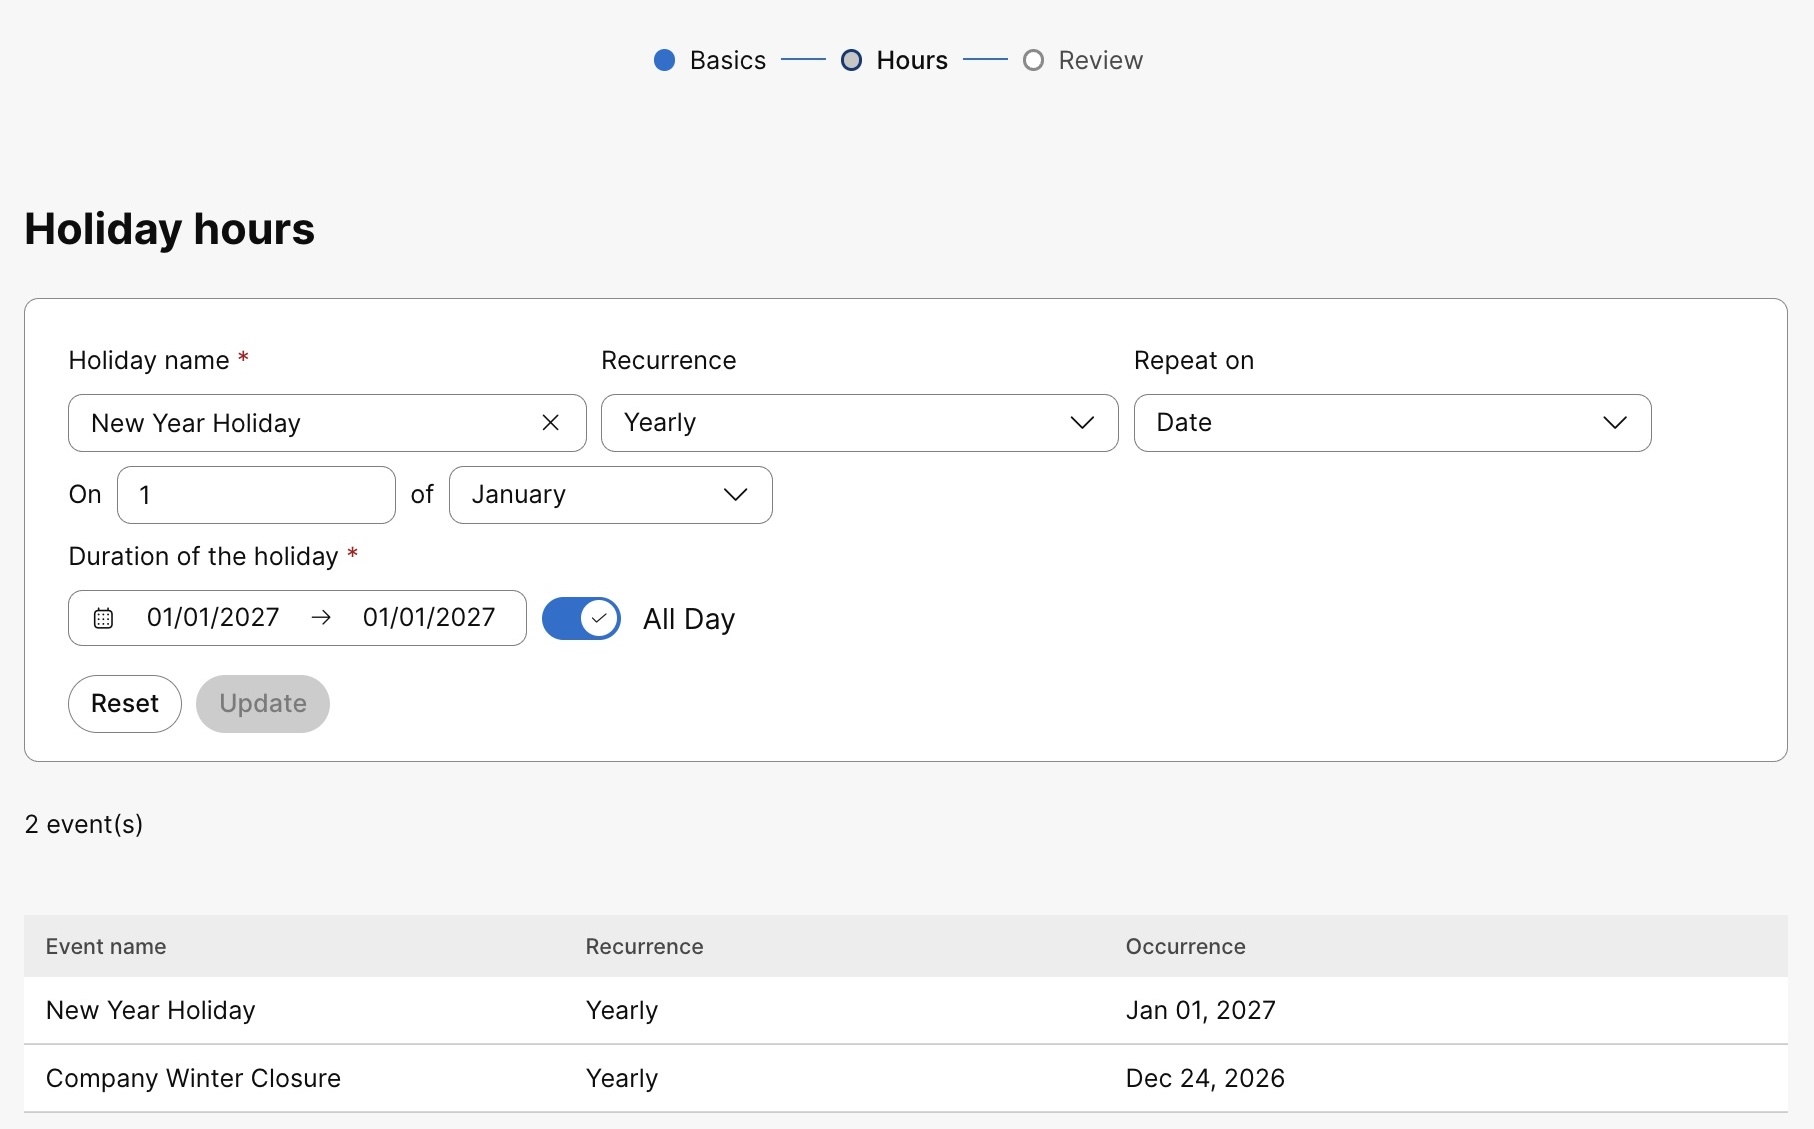
On the Holiday hours page, complete the following settings and click Next.
|
| 7 |
On the Review page, verify the schedule details. Review the basic details and holiday-hour events. Click Edit in a section if you need to change the details. |
| 8 |
Click Create a schedule. |
Control Hub returns to the schedules list. When the schedule is created successfully, a success message appears and the list shows the schedule.
View the schedules list
Use the schedules list to view and manage organization-level and location-level schedules.
| 1 |
Sign in to Control Hub. |
| 2 |
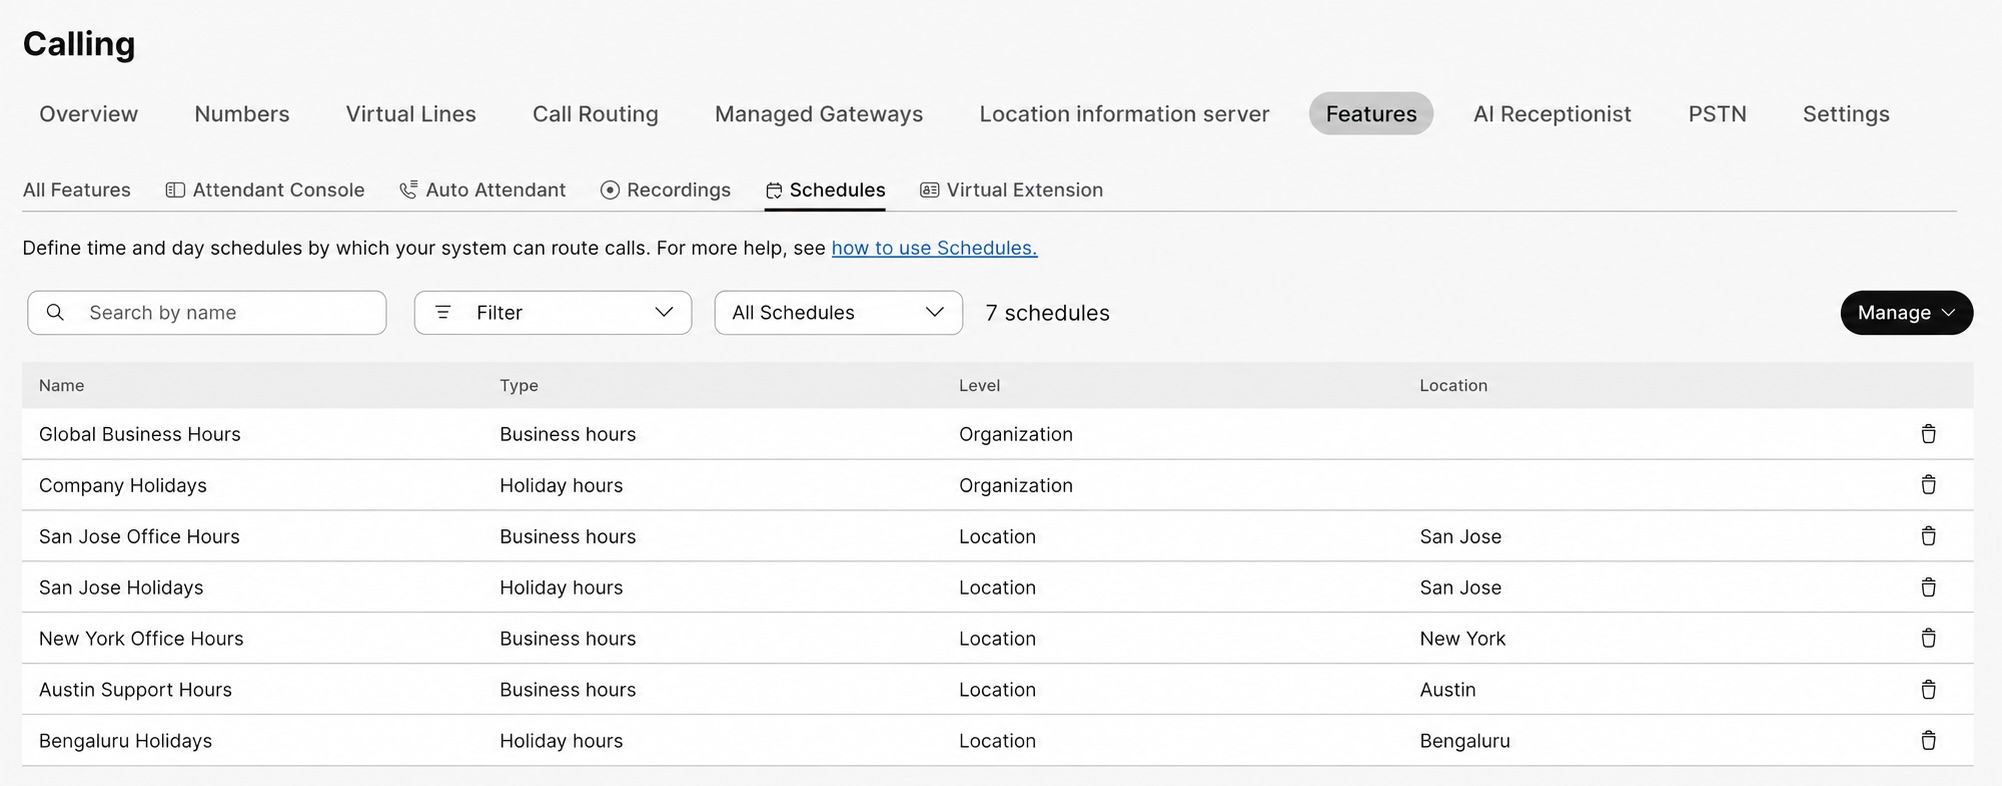
Go to . The page shows the list of schedules created with its Name, Type, Level, and Location. For an organization schedule, the location is shown as not applicable.
To find a specific schedule, enter the schedule name in Search by name field. To filter schedules by type, click Filter, then choose Business hours or Holiday hours. To clear the type filter, click Reset. To filter schedules by level or location, click the All Schedules dropdown, then choose All Schedules, All Locations, Organization, or a specific location. To view the schedule details, click the schedule name. To add or bulk manage schedules, click Manage. |
View feature instances that use a schedule
View feature instances for a schedule when you want to see which calling features reference the schedule before you edit, delete, or move it.
| 1 |
Sign in to Control Hub. |
| 2 |
Go to . |
| 3 |
Find a schedule that you want to review. |
| 4 |
Click a schedule name to open the schedule details page. |
| 5 |
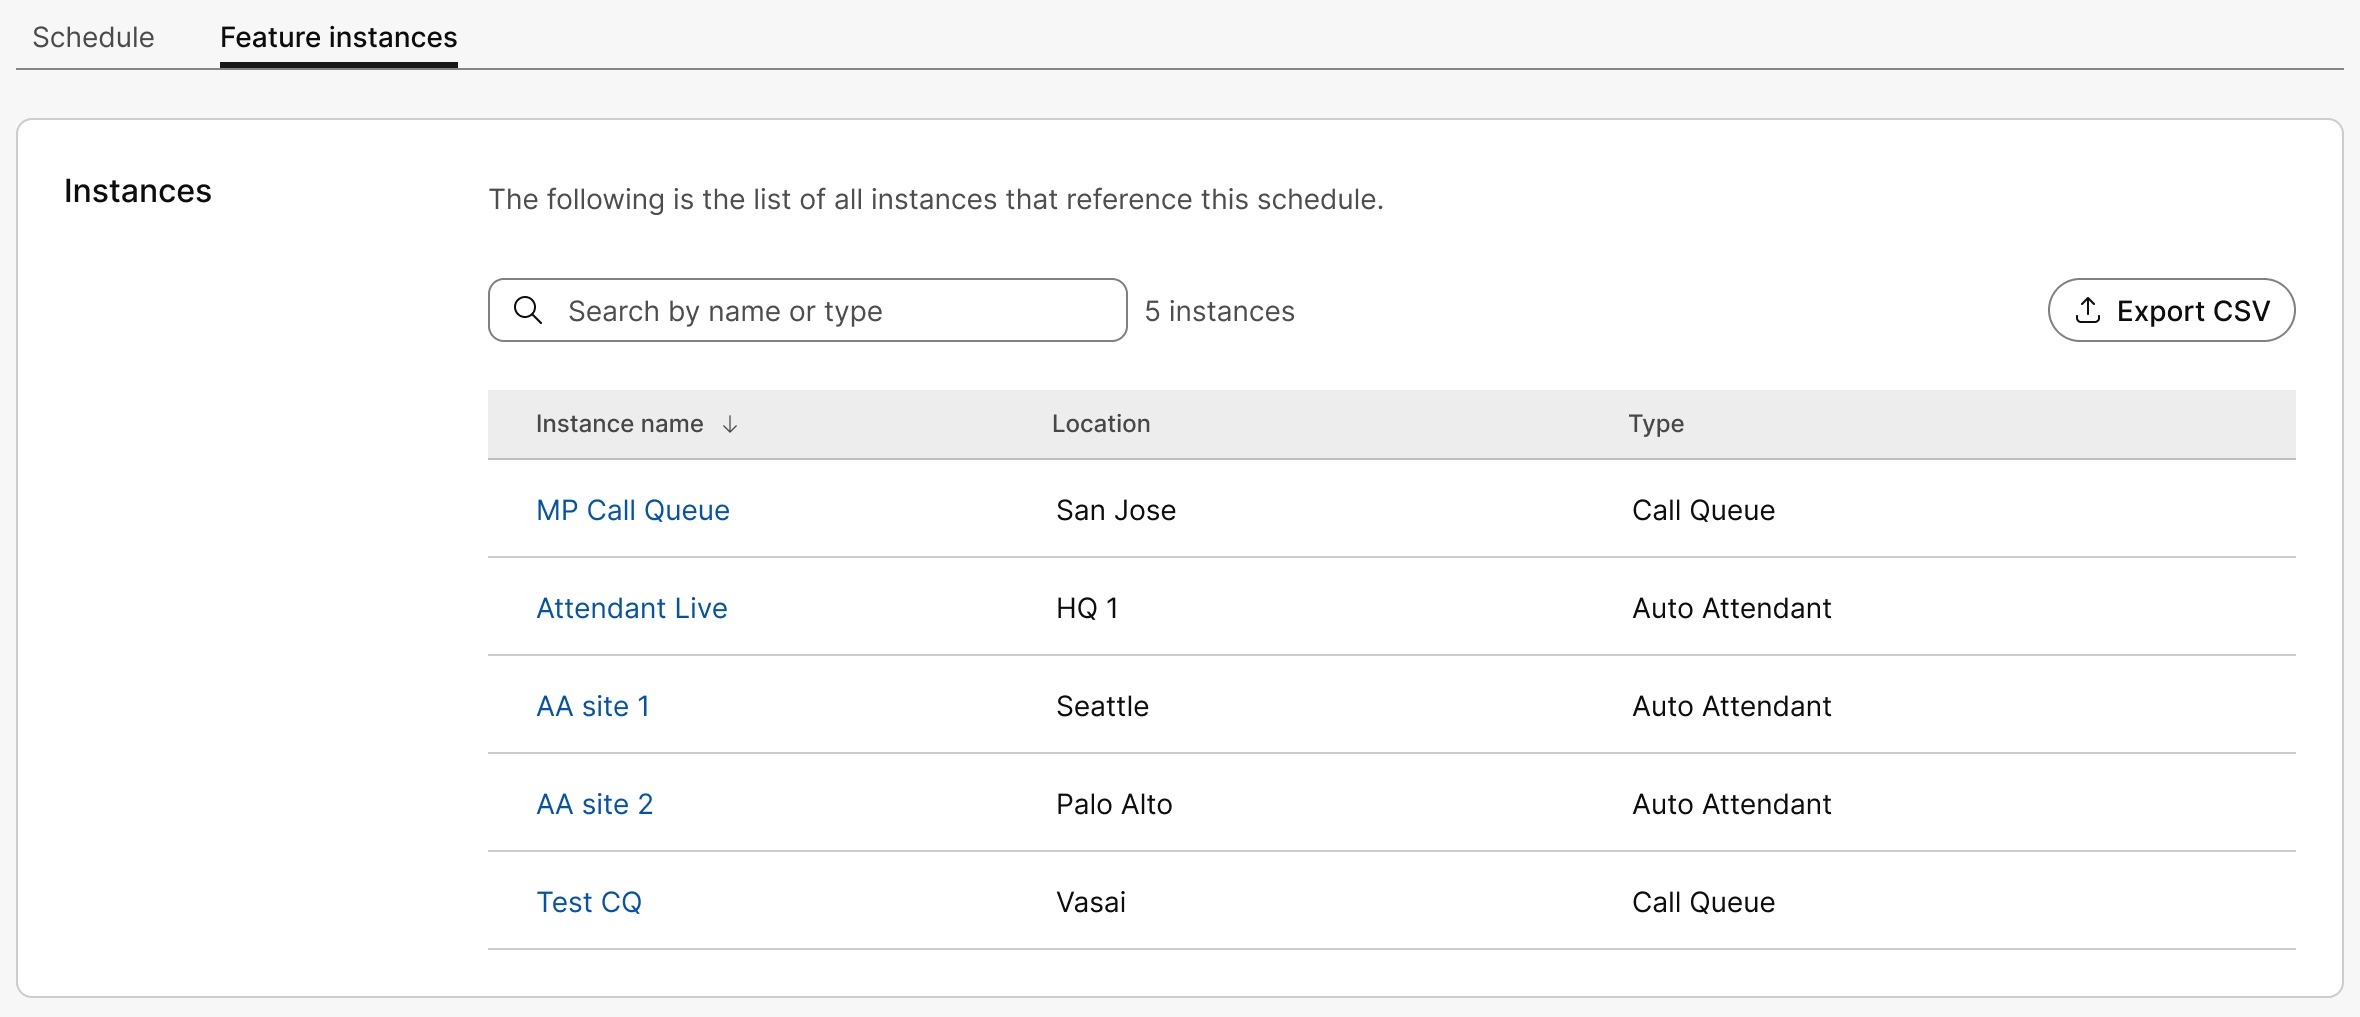
Click the Feature instances tab.
|
| 6 |
Review the instances that reference the schedule. Control Hub displays the instance count. You can search by name, location, or type. The table includes Instance name, Location, and Type of the feature. If 2000 instances use a schedule, you see only the Export CSV option. Click Export CSV to export the full list of feature instances that use the schedule. Download the CSV file from Task Manager when it's ready. |
Move a location schedule to organization level
Move a location schedule to organization level when you want to make an existing location schedule available across supported locations and calling features.
You can't move a schedule back from the organization level to the location level.
| 1 |
Sign in to Control Hub. |
| 2 |
Go to . |
| 3 |
Click a schedule name to open the schedule details page. |
| 4 |
On the Schedule tab, from the Level drop-down, select Organization.
|
| 5 |
Click Save. |
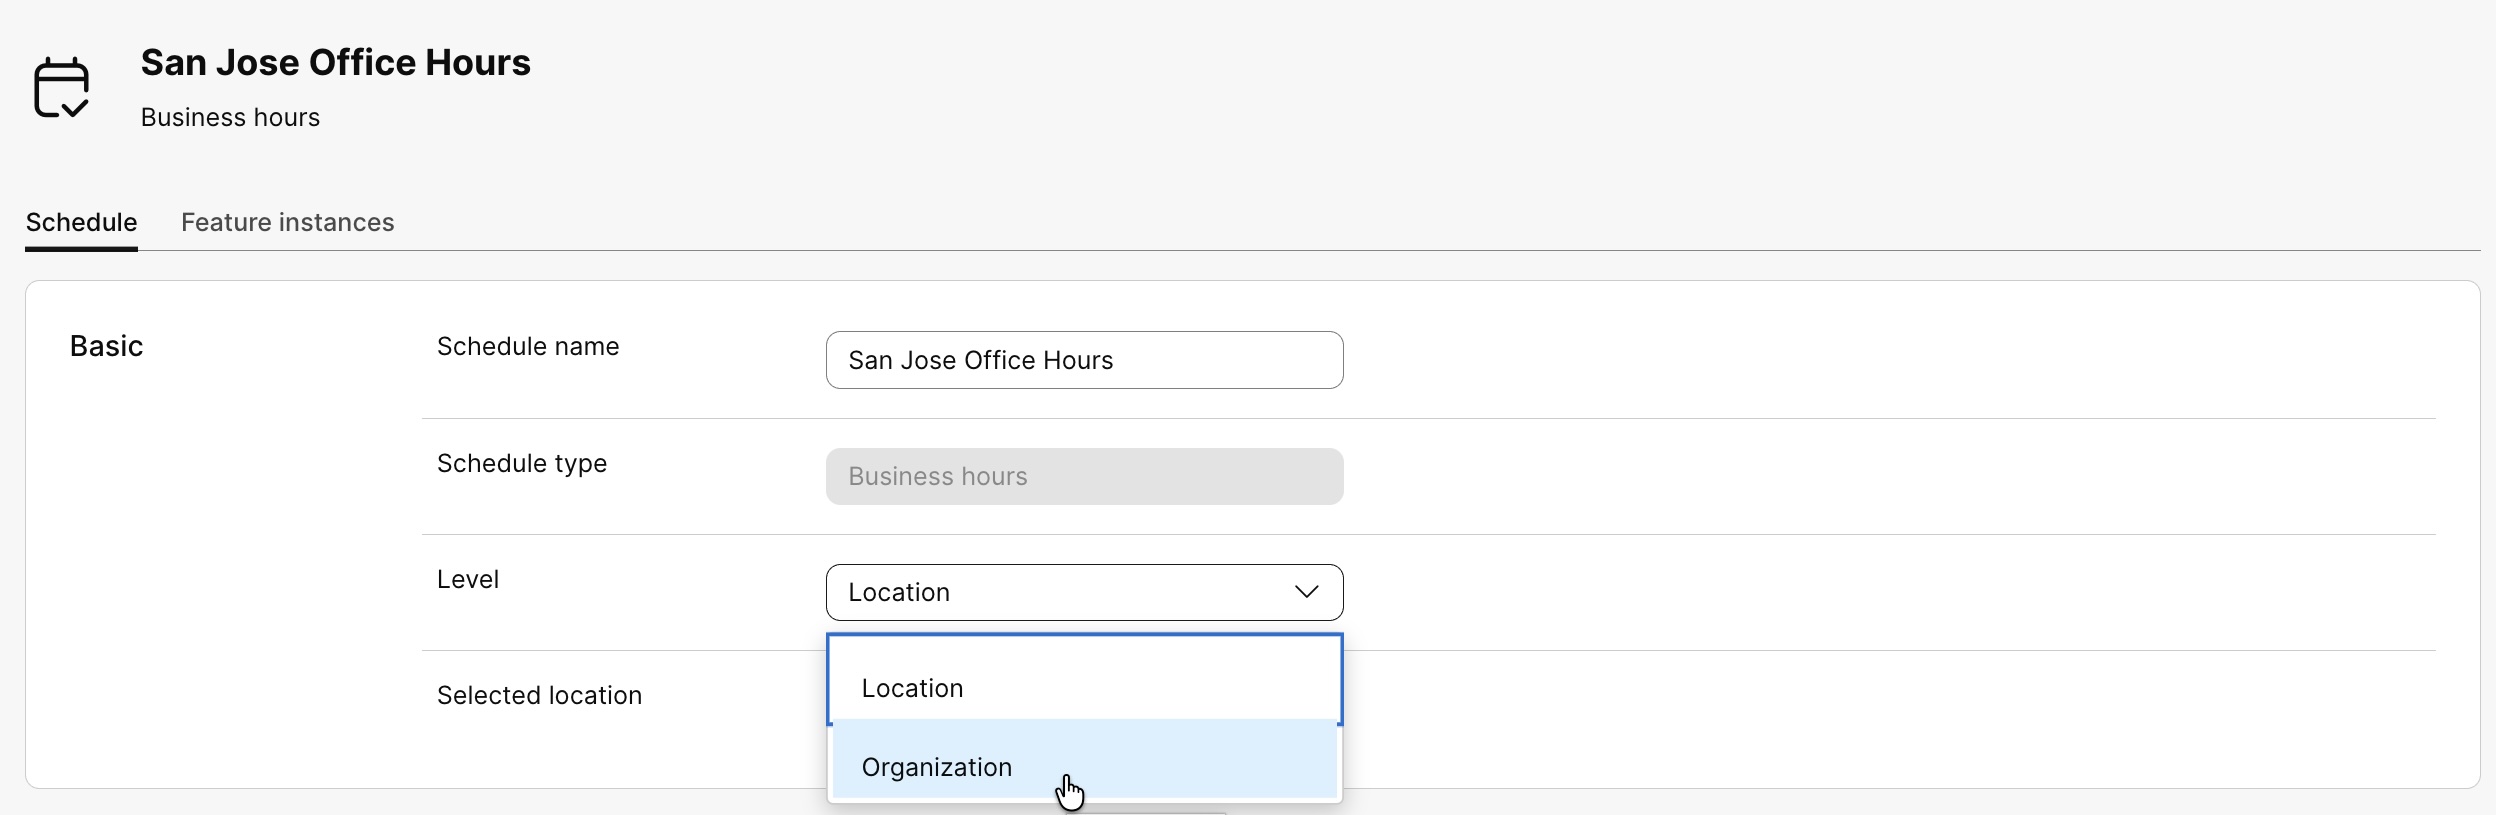
Control Hub updates the schedule level to Organization.
Edit or delete an organization or location schedule
Before you begin
Before you edit or delete a schedule, review the feature instances that use it so you understand which calling features get affected.
| 1 |
Sign in to Control Hub. |
| 2 |
Go to . |
| 3 |
To delete a schedule, click the Use the Manage drop-down to add additional schedule. |
| 4 |
Click a schedule name to update the event details. |
| 5 |
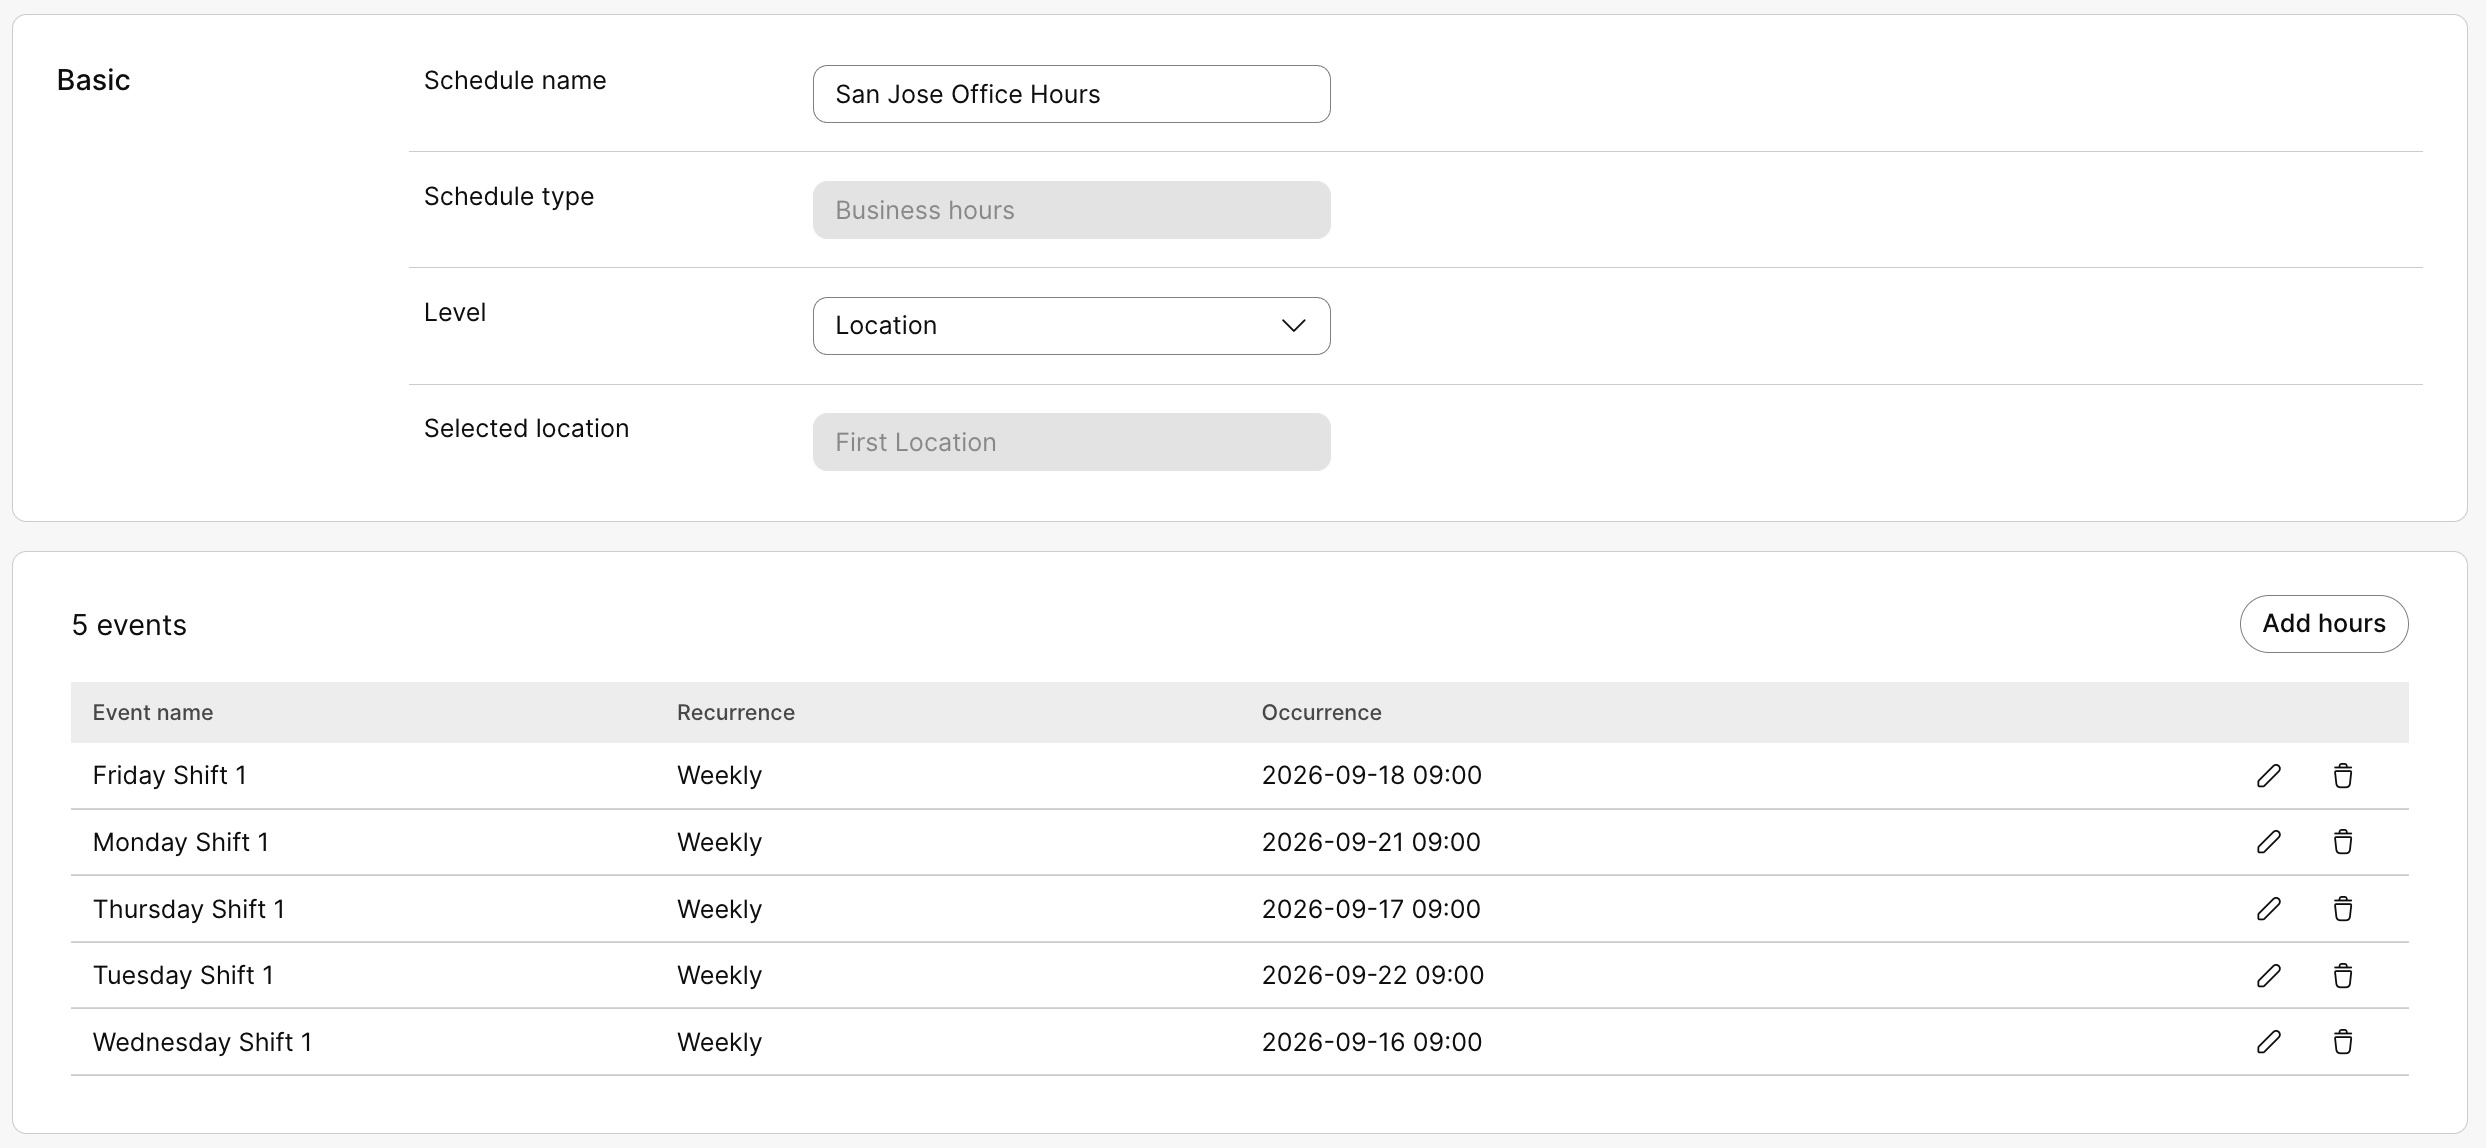
On the schedule page, review the schedule information. The Basic section shows Schedule name, Schedule type, and Level and Schedule location if it's a location schedule. You can't edit the schedule type. If it's an organization schedule, you can't edit the schedule level. The events table shows the event count and the columns Event name, Recurrence, and Occurrence. You can sort by event name, add hours, edit a row, or delete a row.
|
| 6 |
To edit an event, click the |
| 7 |
To delete an event, click the |
| 8 |
To add additional hours to the schedule, click Add hours. You can add up to 30 events at a time. Each schedule can include up to 150 events in total. If a schedule already has 150 events, Add hours option is unavailable. |
| 9 |
Click Save. |
 icon in the schedule row.
 icon for the event row.
Bulk add or edit schedules
Use CSV to add bulk or update schedules. You can download current schedule data, update the CSV file, and upload the modified file to apply schedule changes. You can also download a blank CSV template when you want to add schedules in bulk.
Before you begin
-
Before uploading your schedule/events CSV, make sure to read Bulk provisioning Webex Calling elements using CSV to understand the CSV conventions.
-
You can export your existing schedules and events to add, delete, or modify data in the exported file. Alternatively, you can export a sample file to create a new set of schedules and events. After making the required changes, upload the file using the bulk feature.
Exporting CSV file into ZIP file format: When exporting data to a CSV file, the number of records may exceed 1000. In such cases, the ZIP file is downloaded, where the ZIP file contains the full set of record(s) in a single CSV file. A separate folder containing all the data is broken down into multiple CSV files with less than 1000 records each. These files are generated for the administrators to quickly import any updates and upload.
-
It’s important to know the mandatory and optional columns, and information that you need to provide when filling out the CVS template. The specific fields for the schedule/events CSV are found in the following table.
-
The maximum number of rows is 1,000 (not including the header).
-
Each row can hold a maximum of 10 events.
-
You can create a maximum of 1000 schedules for a location.
-
You can add a maximum of 150 events per schedule.
| 1 |
Sign in to Control Hub. |
| 2 |
Go to . |
| 3 |
Click Manage and choose Bulk manage. |
| 4 |
Select the schedule level.
|
| 5 |
Download the CSV file that you want to use.
|
| 6 |
Open the CSV file and make the required schedule changes. |
| 7 |
Drag and drop or click Choose a file to upload the modified CSV file. |
| 8 |
Click Upload. |
| 9 |
To check the upload status, click View upload history/tasks. |
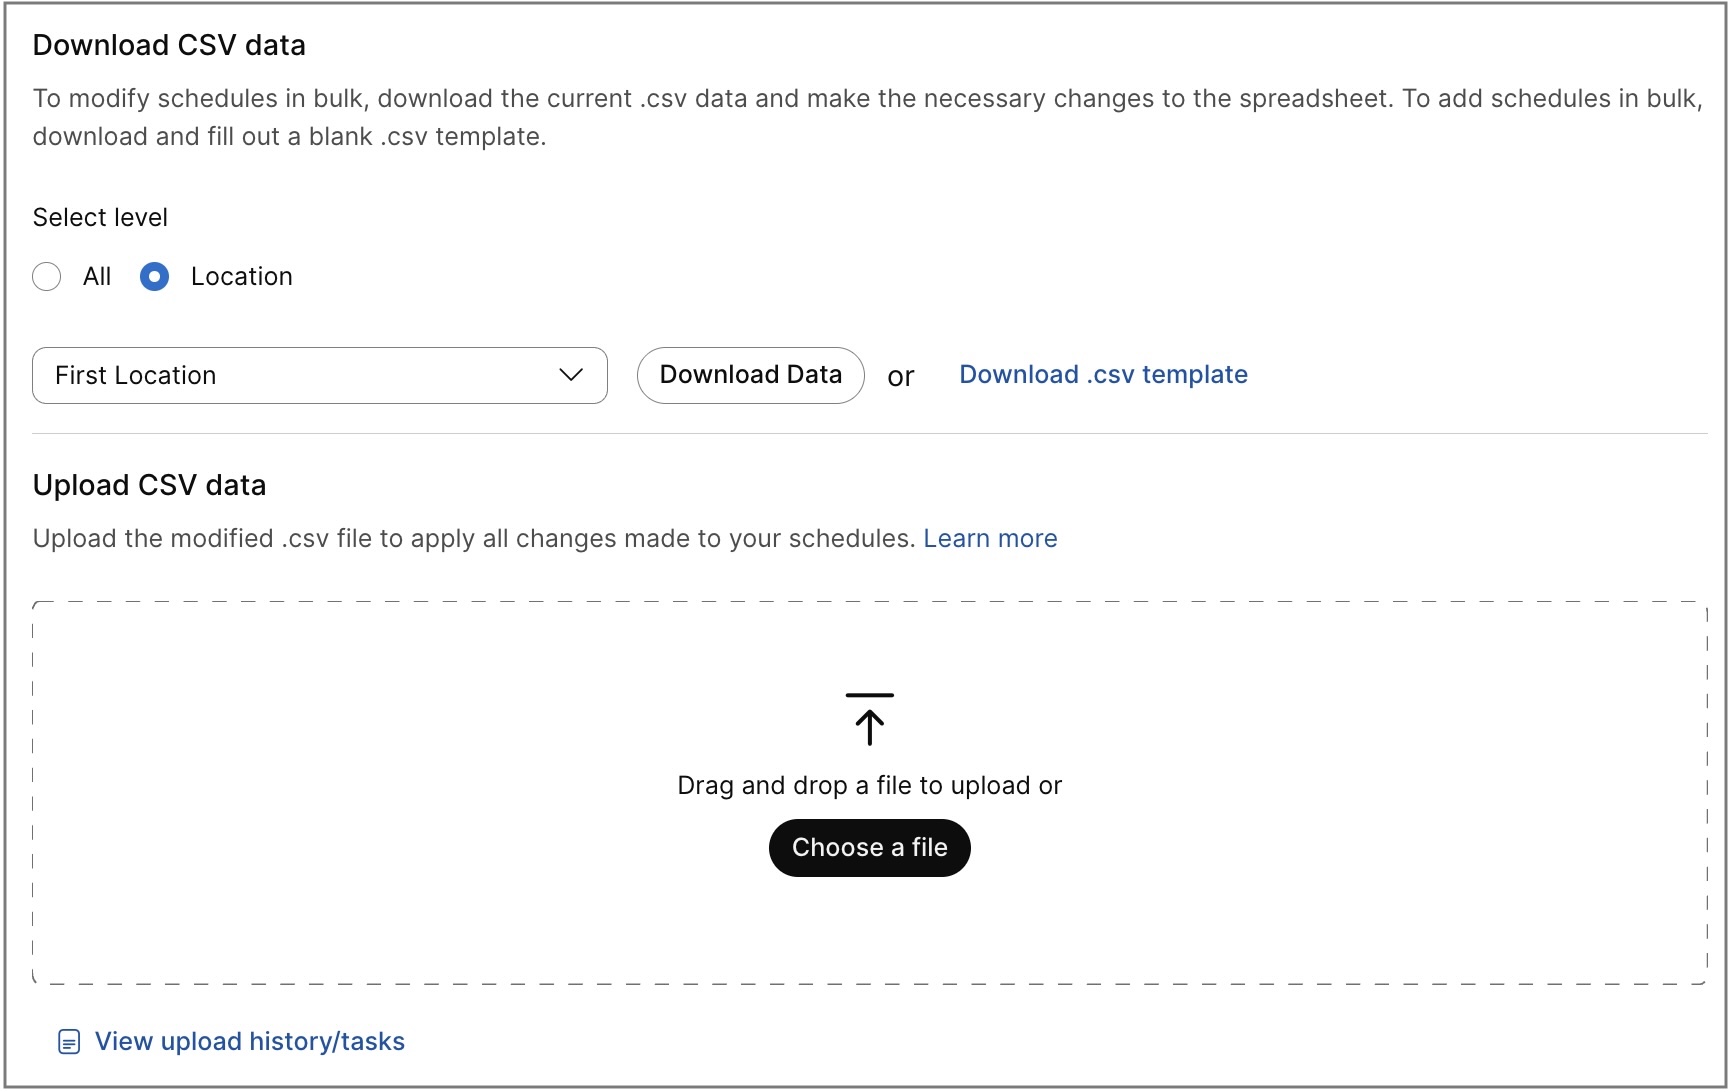
Control Hub processes the CSV file and applies the valid schedule changes. Review the upload task details to confirm whether the file was processed successfully or whether any rows need correction.
CSV file format reference
Use this table to see what fields are mandatory or optional, and what you need to determine when adding or editing schedules and events in bulk.
| Column | Mandatory/Optional | Description | Supported Value (Example) |
|---|---|---|---|
|
Name |
Mandatory |
Enter a name to identify the schedule. |
Location_A |
|
New Name |
Mandatory when schedule action is set to REPLACE |
Enter the new schedule name if you want to rename a schedule. |
Location_B |
|
Level |
Mandatory when you create an organization-level schedule. Optional for a location-level schedule. If you leave this field blank, the schedule is treated as a location-level schedule. |
Enter the schedule level. Use ORGANIZATION for an organization-level schedule. Use LOCATION for a location-level schedule. For location-level schedules, provide the location name in the Location column. For organization-level schedules, leave the Location column blank. |
ORGANIZATION LOCATION |
|
Location |
Mandatory for location schedules |
Enter the location of the organization when the schedule level is LOCATION. Leave this field blank when the schedule level is ORGANIZATION. To duplicate a schedule across multiple locations, copy the schedule record to a new row and associate it with the new location. To make parallel changes to a schedule across multiple locations, do a search/replace on the exported CSV and re-import.
A maximum of 1000 schedules can be created for a location. |
Location A |
|
Schedule action |
Mandatory |
Enter the schedule action column value to add, modify, remove, replace, and promote. To add a schedule, enter ADD. To modify a schedule, enter the column that you want to update with the new value. To remove a schedule, enter REMOVE. To rename a schedule, enter REPLACE and fill the New Name column. To move a schedule from location level to organization level, enter PROMOTE, and enter LOCATION in the Level field, and leave the New Name field blank. |
ADD REMOVE REPLACE PROMOTE |
|
Schedule type |
Mandatory |
Enter the type of schedule (Time/Holiday) that you want to add. Enter TIME for adding the business hours schedule and HOLIDAY for adding the holiday schedule. |
TIME HOLIDAY |
|
Event action |
Mandatory when event fields are populated. Otherwise, this field is optional. |
In a single row, you can add up to 10 events for the same location. To add more events, proceed with adding a new row. Enter ADD to add an event. Enter REPLACE to replace the previously assigned event details with the new one. Enter REMOVE to remove an event. |
ADD REPLACE REMOVE |
|
Event name |
Mandatory when event fields are populated. Otherwise, this field is optional. |
Enter the name of the event. |
Cisco Day |
|
Event start date |
Optional |
Enter the start date of the event in the format YYYY-MM-DD or MM/DD/YYYY format. |
2025-06-18 06-18-2025 |
|
Event end date |
Optional |
Enter the end date of the event in the format YYYY-MM-DD or MM/DD/YYYY format. |
2025-06-18 06-18-2025 |
|
Event start time |
Optional |
Enter the start time of the event. |
12:00 |
|
Event end time |
Optional |
Enter the end time of the event. |
14:00 |
|
Event recurrence type |
Optional |
Enter the Recurrence as NONE, WEEKLY, YEARLY_BY_DAY, YEARLY_BY_DATE |
NONE |
|
Event day of recurrence by week |
Optional |
Choose the recurrence based on the event - day of recurrence by week, day of yearly recurrence by day, week of yearly recurrence by day, month of yearly recurrence by day, date of yearly recurrence by date, month of yearly recurrence by date. A maximum of 150 events can be added per schedule. |
MONDAY |
|
Event day of yearly recurrence by day |
Optional |
MONDAY |
|
|
Event week of yearly recurrence by day |
Optional |
FIRST, SECOND, THIRD, FOURTH, or LAST |
|
|
Event month of yearly recurrence by day |
Optional |
JANUARY |
|
|
Event date of yearly recurrence by date |
Optional |
24 |
|
|
Event month of yearly recurrence by date |
Optional |
APRIL |
Manage user schedules
You can create a schedule for a user and apply it only to that user's call settings such as sequential ring, simultaneous ring, or priority alert. These call settings perform the defined actions based on the time frame in the schedule, making it more convenient for users to manage their calls.
Create a user schedule
| 1 |
Sign in to Control Hub. |
| 2 |
Go to . |
| 3 |
Select a user and click the Calling tab. |
| 4 |
Go to the Call handling section and select Schedules. |
| 5 |
Click New Schedule. |
| 6 |
Enter a Schedule Name. 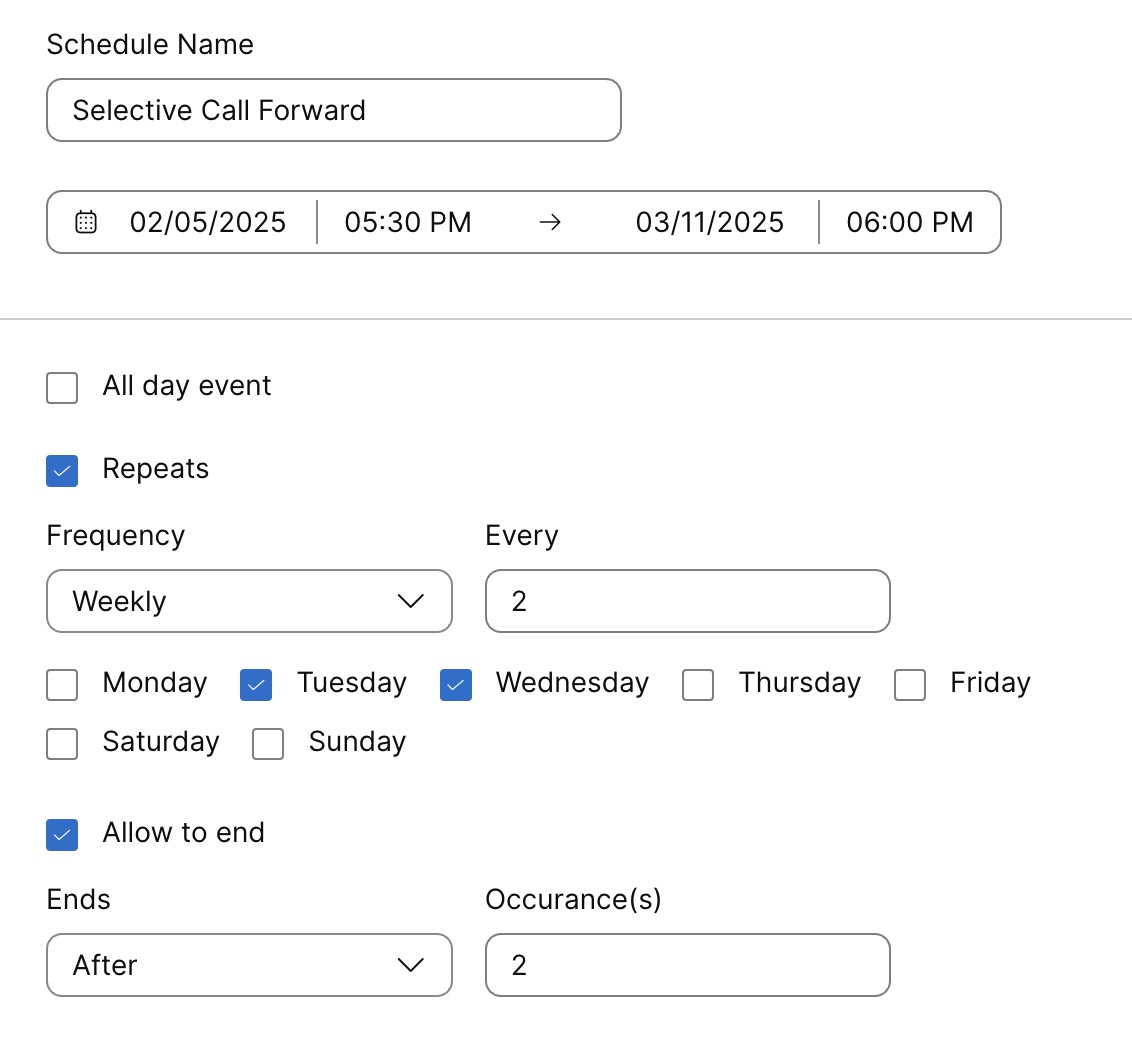
|
| 7 |
Set the schedule start and end date and time. |
| 8 |
Select All day event if the schedule lasts the entire day. |
| 9 |
Select Repeats if you want the schedule to occur repeatedly. Choose one of the following frequencies:
Select Allow to End if you want to define when the repeating schedule should stop. When selected, the Ends drop-down appears with two options:
|
| 10 |
Click Save. A user can also create schedules on their own in the User Hub. For more details, see, Create schedules for call settings. Any changes the user makes to these settings are reflected in both the User Hub and Control Hub. |
Edit or delete a user schedule
Before you begin
To delete a user schedule, you must first remove it from all the call settings that are using it.
| 1 |
Sign in to Control Hub. |
| 2 |
Go to . |
| 3 |
Select a user and click the Calling tab. |
| 4 |
Go to the Call handling section and select Schedules. The list of the schedules and events created appears.
|
| 5 |
To add more events to a schedule, expand the schedule and click Add event. |
| 6 |
To delete a schedule, click
|
 and choose